Thursday, December 28, 2017

Christmas Projects finished!

Good afternoon! I hope you've had a lovely Christmas season thus far!  I haven't posted in awhile and the pics I am including here below show why...I make most of our Christmas gifts for our family in the form of quilted items and baked goods.  The "Joy" item is a tablerunner and/or a banner that I found a free pattern for online.  Very easy and I love the way it turned out!
I also made a tablerunner set with matching placemats in a stripe. And below is a small table topper that was fun to do using simple half-square triangle sets. You can arrange them in a million different ways for variety!


 The black, gray, white items are a tablerunner with matching place mats that a friend wanted for her daughters to give her for Christmas.
 And these are log cabin coasters or mug rugs (unfinished in this pic) 
I haven't done any log cabins in ages and really enjoyed working with them again. They also make really cute tablerunners. These were made from 1 1/4" strips - very small! But if you cut 2" strips or larger you can make a project that will go together much quicker!
 Buckeyes are a perennial Christmas favorite at our house. They take a lot of time, but it's so worth it! It just doesn't get any better than peanut butter & chocolate! (as you can see below, I had to "test" one...it's the least I can do for my family to make sure they only get the best!....)  ;)
 And this is the sampling of nearly every Christmas cookie or candy I made this year - ready to go on the table for part of our dessert. I made the easy Eaglebrand Milk fudge, snickerdoodles, 7 layer bar cookies, and 2 types of chocolate bark. One with white chocolate on top of dark, and pistachios and craisins stirred in, the other with broken candy canes. Easy, easy, stuff and it all freezes well!  So I don't have to make it all at the last minute...a huge plus!
 I also make cinnamon rolls for gifts for everyone's family, but did not get a pic of those this year.

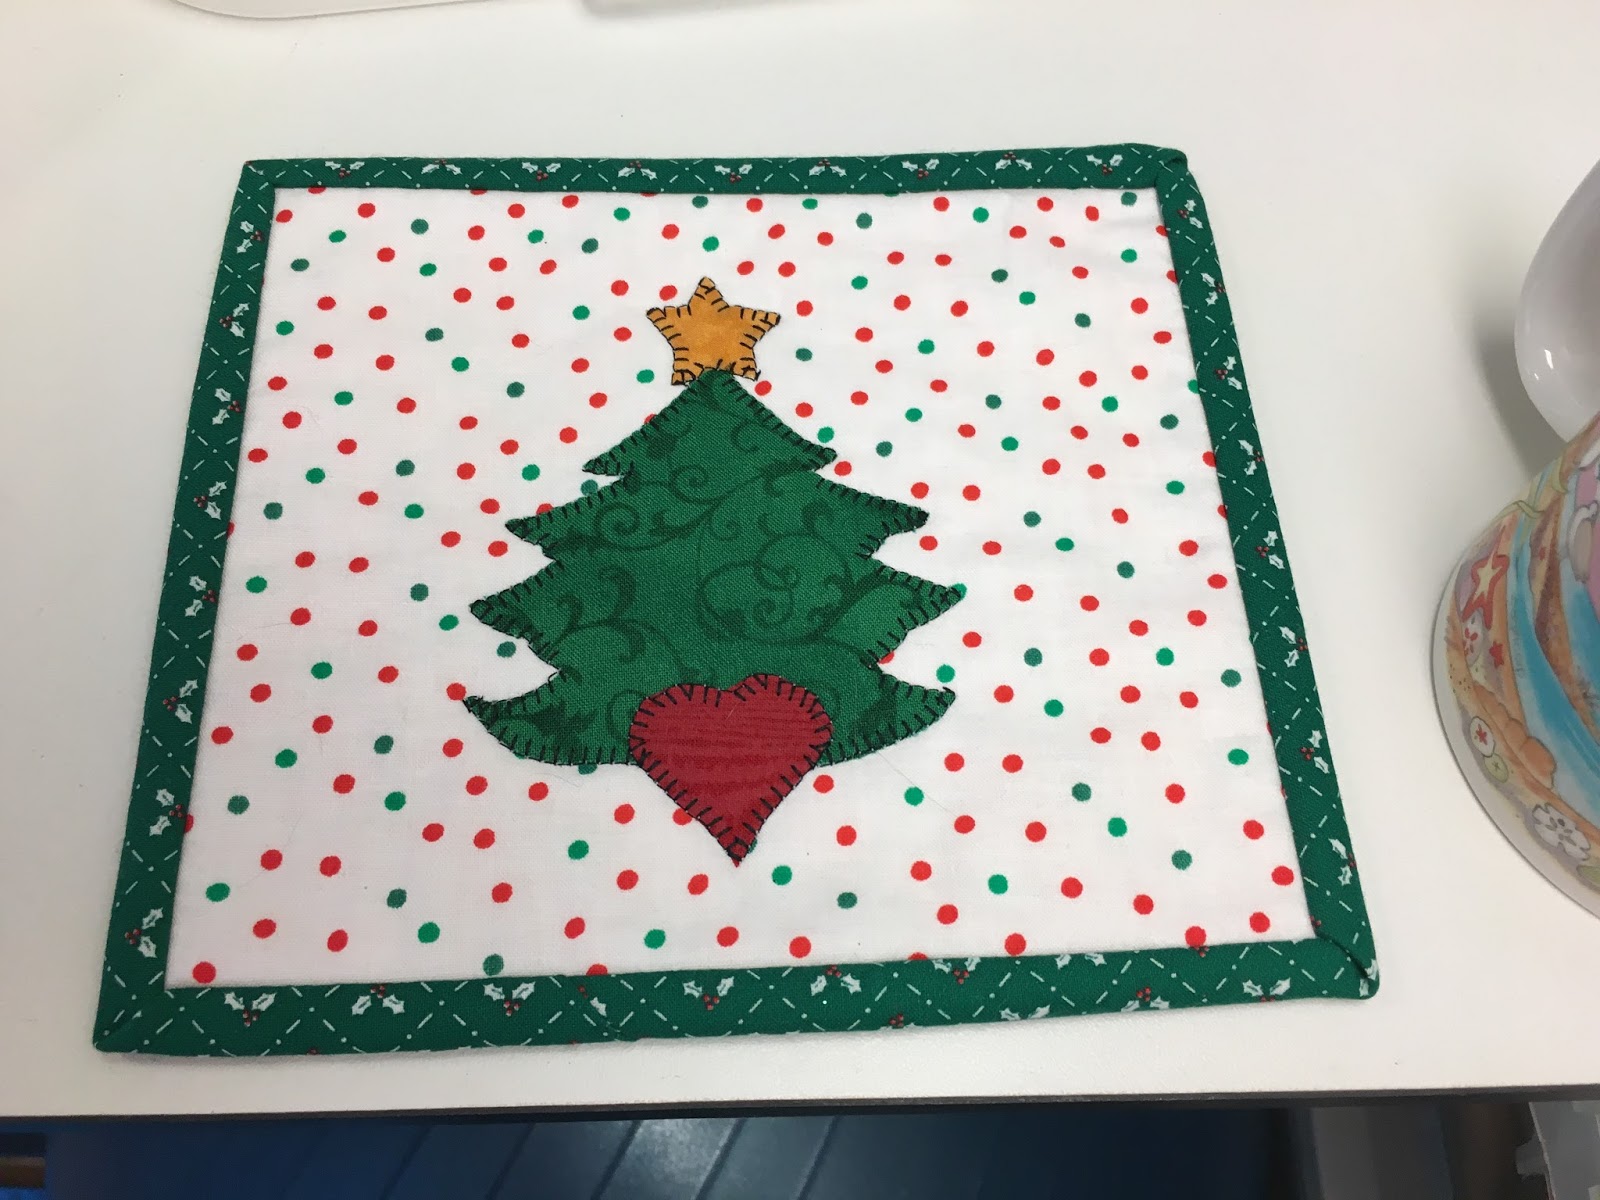
Below is a mug rug I made several of to give as small gifts.  I also made some with snowmen - but somehow didn't get pics of those, either...one can only do so much, right?
The Key is to enjoy the Holidays and not get crazy over what doesn't get done. I do hope that you were also able not to stress over it all!

Christmas quote: "Christmas is the spirit of giving - and may it last all the year through!" ~me 

Friday, December 1, 2017

Christmas wall-hanging

Good morning!  It's December 1st already - are you going crazy yet??  I'm not quite there, but I'm certain it's just around the corner.  I can begin projects and list-making and shopping (mostly online) weeks and even months before Christmas and yet I'm always looking for last-minute projects to finish! I must be addicted to the rush of the deadline....or something...

 I designed this star block wall-hanging from adding to an Ohio Star and wanted to share it with you - it makes a lovely block for a wall-hanging or table runner. (It probably has been around for decades, but I was just playing with fabric and didn't follow a certain pattern and this is what popped out!...well....not exactly "popped"...you'll see how in the pics & tutorial. Hopefully, I can remember what exactly I did...) :))
Finished size: 16" square

Here we go: Cut 2- 3 1/4" squares of a light fabric and cut corner to corner to make 4 triangles. These will be the points of the Ohio Star portion of this star block.
 Cut 2- 3 1/4" squares of a contrasting fabric  and sew together into the sets to the right..
Now sew 2 of these sets to each other, making the quarter-square triangle sets. You will have 4. They should be 2 1/2" squares. Set aside for later..

Cut 4 - 2 1/2" squares of your darker contrasting fabric and one light 2 1/2" square for the center of the star.
 Sew together in rows to make the Ohio Star block below.
   
Ohio Star
Next, cut 4 - 2 1/2" squares of the light fabric. Draw a line from one corner to another.  Cut 4 - 6 1/2" squares of the dark fabric. Place light square over one side of the dark and sew on that line, corner to corner. Do the same for the other side as below.  Make 4 of these units.
   Now sew 2 of these units to the

Ohio Star block top and bottom as below. Then sew 2 dark 2 1/2" squares to the ends of the other 2 units and add on the sides.


Next cut 8 - 1 1/2" x 10 1/2" strips of the dark fabric and 4- 1 1/4" x 10 1/2" strips of the light and sew together as below.  Add the side strips first. Cut 4- 3 1/8" squares for the corners and add to top & bottom strips and sew on last.  Bind and add tabs to hang on dowel rod - or you can sew on a sleeve on back for the rod to slip through.


   And there you have it! Hope you have fun creating your own stars!

Quote of the day: Christmas is not so much about opening presents as about opening our hearts.

Cinnamon Bundt Cake Recipe

     T'was the day before Thanksgiving and all through the house, there are aromas of food that would hurry a mouse! The turkey wa...