Showing posts with label sewing. Show all posts

Friday, December 1, 2017

Christmas wall-hanging

Good morning!  It's December 1st already - are you going crazy yet??  I'm not quite there, but I'm certain it's just around the corner.  I can begin projects and list-making and shopping (mostly online) weeks and even months before Christmas and yet I'm always looking for last-minute projects to finish! I must be addicted to the rush of the deadline....or something...

 I designed this star block wall-hanging from adding to an Ohio Star and wanted to share it with you - it makes a lovely block for a wall-hanging or table runner. (It probably has been around for decades, but I was just playing with fabric and didn't follow a certain pattern and this is what popped out!...well....not exactly "popped"...you'll see how in the pics & tutorial. Hopefully, I can remember what exactly I did...) :))
Finished size: 16" square

Here we go: Cut 2- 3 1/4" squares of a light fabric and cut corner to corner to make 4 triangles. These will be the points of the Ohio Star portion of this star block.
 Cut 2- 3 1/4" squares of a contrasting fabric  and sew together into the sets to the right..
Now sew 2 of these sets to each other, making the quarter-square triangle sets. You will have 4. They should be 2 1/2" squares. Set aside for later..

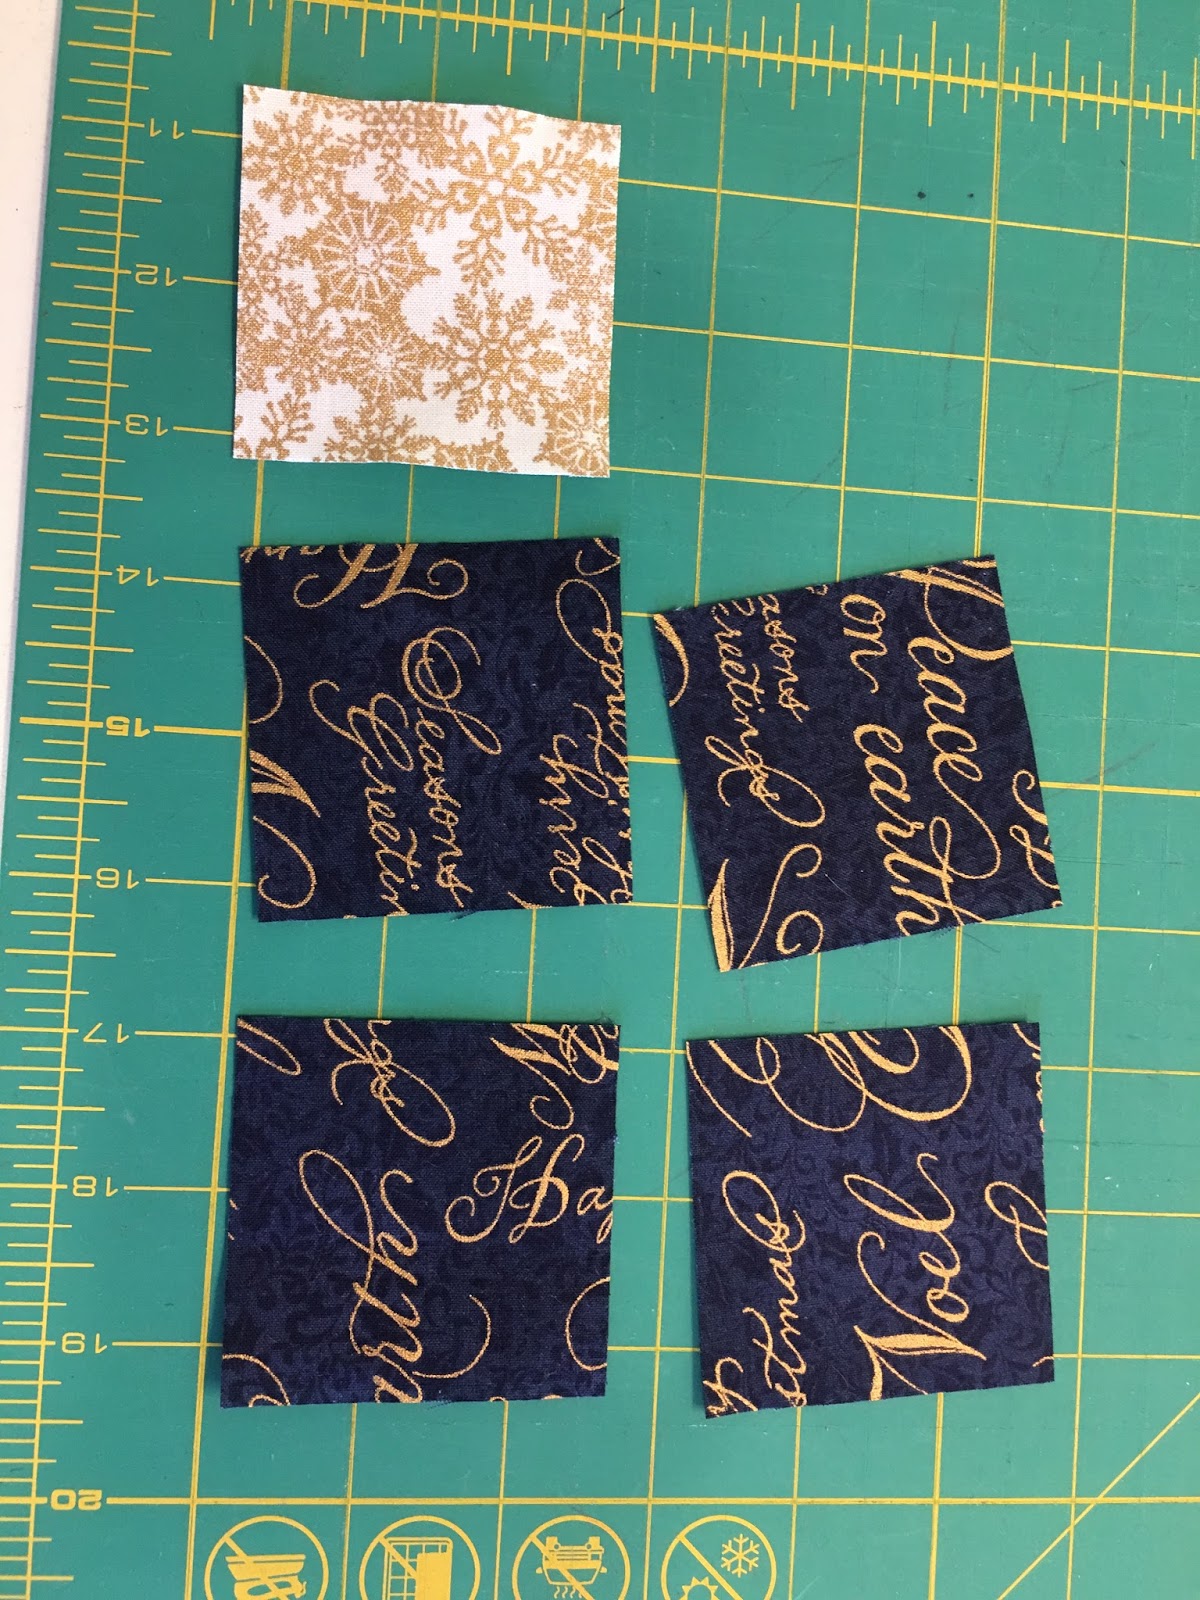
Cut 4 - 2 1/2" squares of your darker contrasting fabric and one light 2 1/2" square for the center of the star.
 Sew together in rows to make the Ohio Star block below.
   
Ohio Star
Next, cut 4 - 2 1/2" squares of the light fabric. Draw a line from one corner to another.  Cut 4 - 6 1/2" squares of the dark fabric. Place light square over one side of the dark and sew on that line, corner to corner. Do the same for the other side as below.  Make 4 of these units.
   Now sew 2 of these units to the

Ohio Star block top and bottom as below. Then sew 2 dark 2 1/2" squares to the ends of the other 2 units and add on the sides.


Next cut 8 - 1 1/2" x 10 1/2" strips of the dark fabric and 4- 1 1/4" x 10 1/2" strips of the light and sew together as below.  Add the side strips first. Cut 4- 3 1/8" squares for the corners and add to top & bottom strips and sew on last.  Bind and add tabs to hang on dowel rod - or you can sew on a sleeve on back for the rod to slip through.


   And there you have it! Hope you have fun creating your own stars!

Quote of the day: Christmas is not so much about opening presents as about opening our hearts.

Saturday, November 18, 2017

Zippered Pouch..so easy, great gift idea!

Good Saturday morning!

I am so very excited about this project!  I watched the Missouri Star Tutorial on YouTube "The Zippered Pouch: An Easy Quilting Project Tutorial" and though I've made zippered pouches and clutch purses before, this is by far the best tutorial and method I've ever seen or done!  So I am just going to take you through a mostly picture tutorial of my own project, but refer you to the Missouri Star video tutorial for a more in-depth lesson.

Once you learn this method for sewing zippers in bags the possibilities are endless!
 

For a pouch 7"x 7 1/2" I began with the lining fabric & cut a 17 x 8 1/2" rectangle. I then cut a piece of fusible fleece to match and fused them by ironing them according to the fleece directions...the bumpy side of the fleece to the WRONG side of the fabric.  For the front of the pouch I cut once piece of fabric 17 x 6 1/2' and another strip for contrast at the top of the pouch 17 x 2 1/2" and sewed them, Right Sides Together right onto the fleece.

After topstitching next to that seam on the Right side, I cut the piece in half which will become the front and back. Make sure both pieces are EXACTLY the same size!

Now we'll prepare the zipper. Choose one that's nylon and is longer than the width of the pouch. Mine was 9".  You'll cut off the end of the zipper and prepare tabs to cover both ends of the zipper by cutting a strip 5" long by 1 1/2" wide. It should match the top fabric of your bag.  Fold in half, then fold both long ends in toward center, then fold in half & press.
 

Stitch with zipper ends inside the fold - be sure to catch both sides. Cut off excess.  Now sew zipper, RIGHT SIDES TOGETHER against top of pouch front. Be SURE to leave 1/2" from both ends - the zipper will be centered against the top with 1/2" left on each end. See photo. Sew about 1/4" from upper edge.  Open and top stitch next to zipper on Right Side.
Now you will sew the other side of the zipper to the RIGHT SIDE of the other piece's TOP edge of the pouch.

Almost done!
Now...VERY IMPORTANT! LEAVE ZIPPER OPEN!!!!  Sew front to back - be sure to line them up and make sure to match up the bottom & sides.  Sew together sides & bottom.  (I squared up the bottom of the pouch...I will show that technique on a future tutorial, but in the meantime you can find some on YouTube, most likely.  Pull through the open zipper, and.....


Voila!
Quote of the day:  "Sewing is not just a craft...it's therapy!" Amen!

Monday, October 30, 2017

The Disappearing 4-Patch Block!

Hello!  Are you ready for some sewing fun? Here we go....!

Here's what we'll be making...  Isn't that just plain fun??  I used Lily & Loom fabrics - the Daisy Collection - from Craftsy.  Loving the bold colors and thinking it will go for either baby boy or girl.  I haven't added borders yet, but will show the finished quilt after I do that.
I used the charm pack size - 5" squares and made 4-patch units using 2 white squares and 2 of each print.  I found out the hard way that it's much better to use squares that when sewn together are divisible by 3 because you'll be cutting the 4-Patch into Thirds.  The 5" squares sewn together came out to 9 1/2" blocks which was not exactly the most fun I've ever had as I tried to cut them evenly into thirds... Here's a sample block:
So...
I tried 4 3/4" squares when I made this blue sample block and it comes out to 9" which of course easily divides into 3's! Yay!  Much, much easier!
And this final picture shows how you can rearrange the pieces to make the design I used on the baby quilt above.
I hope you'll try this and have fun being creative as you experiment!


Here's your inspirational quote of the day:

"Beautiful things come together...one stitch at a time."  ;)


Cinnamon Bundt Cake Recipe

     T'was the day before Thanksgiving and all through the house, there are aromas of food that would hurry a mouse! The turkey wa...